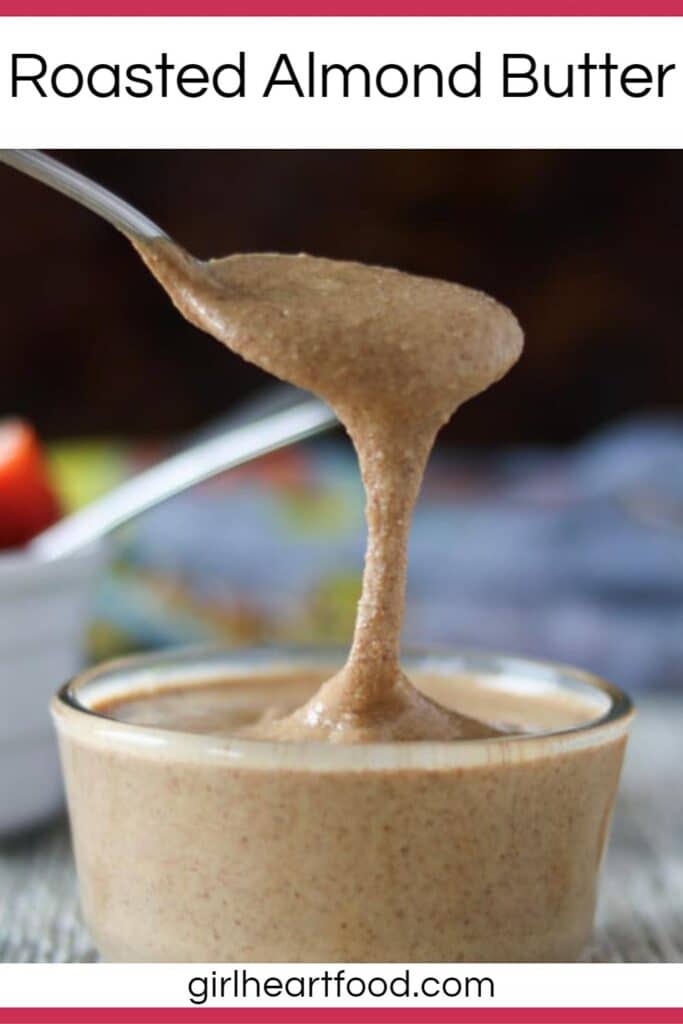
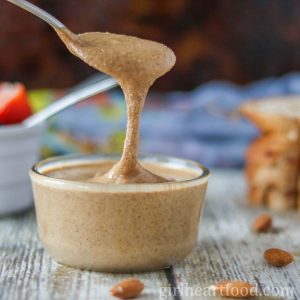
This 2 ingredient roasted almond butter recipe is unbelievably easy to make and tastes so good. Plus, it’s made in about 30 minutes! Once you make almond butter from scratch, there’s no going back to store-bought.
What’s up everyone? Have a nice Easter weekend? Ours was pretty chill. Of course, we had our obligatory feed of fish on Friday. Granted, it may have come battered and with fries, but fish all the same.
I was going to bring you a different recipe today, but I had to switch it up; I just couldn’t wait to share this roasted almond butter with you all and knew this had to happen today. Share the food love, ya know?
This roasted almond butter is almost too easy to make; almost too easy to call it a recipe, but you know what? It is indeed a recipe and happens to be one of my favourite things to date! Are you an almond butter or peanut butter fan? I happen to like both and always have a jar of each in my fridge
Love homemade nut butters? Check out this cashew butter recipe!
How Much Almonds Is Needed?
With about two cups of almonds, you’ll yield about one cup of almond butter.
Notes on Making Almond Butter
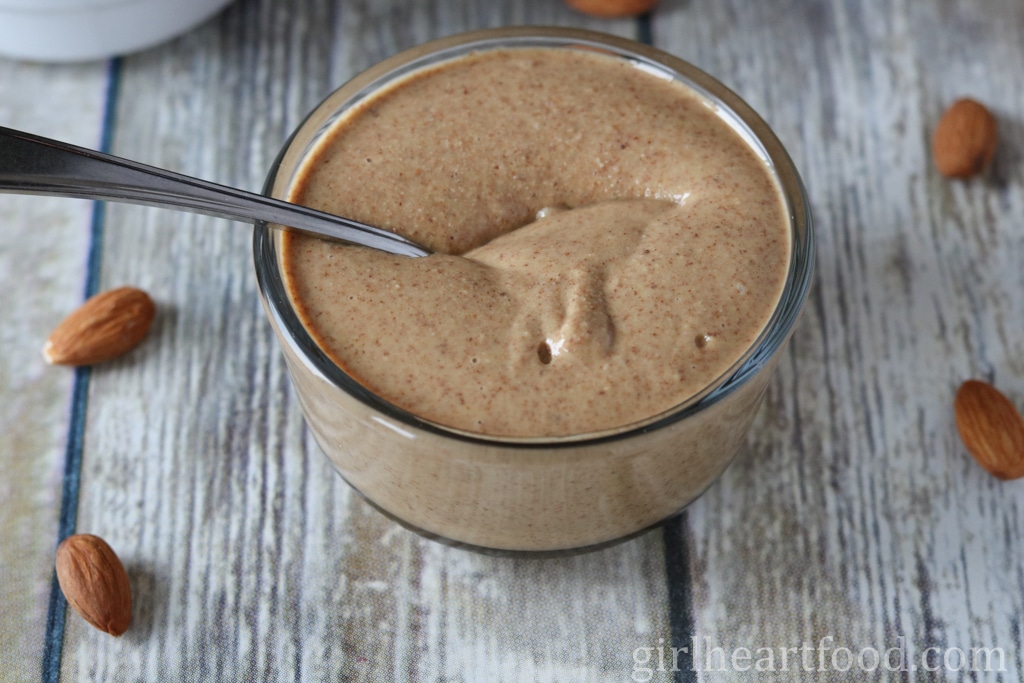
Depending on the power of your food processor, it may take longer (or perhaps less) than 8 to 10 minutes to process those almonds and that’s fine. You know you’re done when the consistency is smooth and creamy.
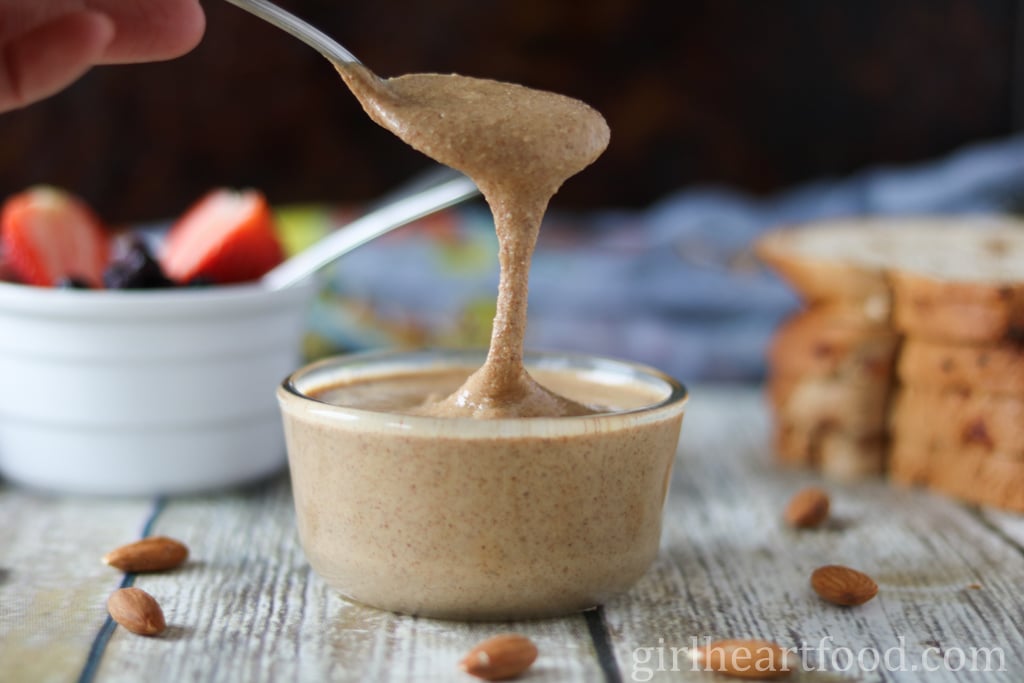
Making this almond butter was like magic before my eyes. No joke. One minute it’s almonds, then practically dust, then, boom, homemade almond butter! After the dust stage, LOL, it starts to come together. You know when you are making bread or dough in a mixer and that moment when it just starts to pull together? It’s so freaky to watch that happen with this recipe.
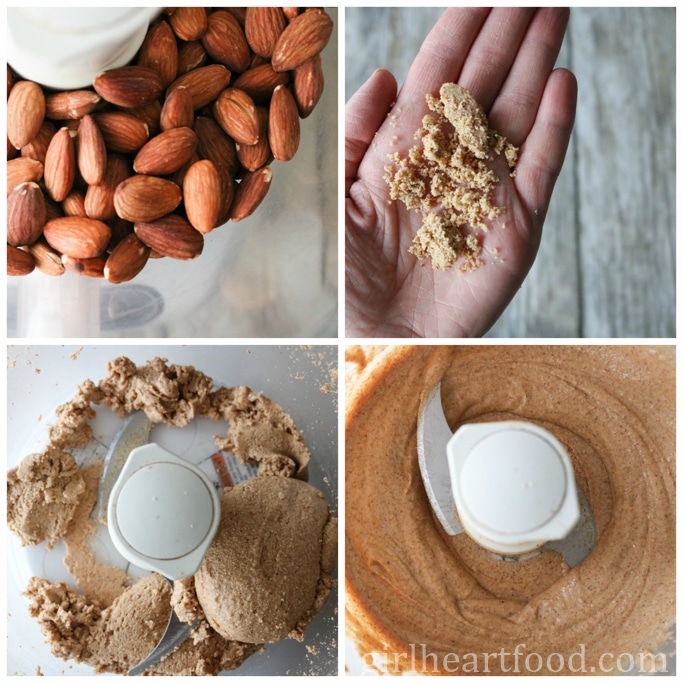
You process the heck out of those almonds, stopping to scrape the sides of the processor every couple of minutes, or as necessary. When you first start out, those almonds are going to look drier than the Sahara desert. It’s drier than dry.
You’ll get thirsty just looking at it. You get the point. Just go with it and you’ll end up with super creamy roasted almond butter.
Ways To Enjoy
- Enjoy on toast
- Spoon over granola
- Use in smoothies
- Eat straight-up with a spoon (that’s what I often do, anyway)
If you give this nut butter recipe a try, be sure to leave a comment below!
Roasted Almond Butter Recipe
Ingredients
- 2 cups whole unsalted almonds
- ½ teaspoon sea salt, optional
Instructions
- Preheat oven to 350 degrees Fahrenheit.
- Place almonds on an unlined baking sheet. Bake for 10 to 12 minutes, watching to ensure they don't burn and rotating the pan about halfway through cooking.
- Remove from the oven and allow to cool.
- Place almonds in a food processor (I use a 12-cup processor).
- Process for 8 to 10 minutes or until creamy, stopping to scrape down sides of processor with a spatula every couple of minutes, or as necessary. Note: The mixture will initially look very powdery and dry (this is completely normal, just go with it; eventually the almonds will break down and will be smooth and creamy). Also, depending on the power of the processor you are using, the process may take a little longer, but that's okay.
- Once mixture is smooth and creamy, add salt (if using) and process for another minute until combined.
- Transfer the almond butter to a storage jar, cover, refrigerate and enjoy within 2 weeks. Yields about 1 cup. Note: Mixture will thicken slightly in the fridge. Enjoy!
Notes
A note on times provided: appliances vary, any prep and/or cook times provided are estimates only.
© Girl Heart Food Inc. Photographs and content are copyright protected.
Tried this recipe?
If you do make this recipe, thank you!! It would mean so much if you could leave a comment below. Love to know how you enjoyed it, and it helps other readers too!
Cathy says
Excellent, and easy. Thank you!
Dawn | Girl Heart Food says
Thank you so much, Cathy!! I’m glad you enjoyed the recipe!!
Elaine @ Dishes Delish says
How easy peasy is that? I’ve never made almond butter, but I eat a TON of it! I’m going to be trying your delicious recipe for sure as I’m sure it will cut down on the cost of buying it pre-made! Thanks for the step by step instructions and photos. I love to see what recipes look like at every stage.
Girl Heart Food says
So happy to hear that, Elaine! It really is super easy!! Thanks so much for your sweet comment – hope you enjoy the recipe 🙂
Veena Azmanov says
What an AMAZING idea! I LOVE how easy and delicious this is! I am in love with the colors and how simple and short the ingredient list is. Yum!
Girl Heart Food says
Thanks very much, Veena! It really is super easy and really tasty 😉
Pam says
How beautiful and mouthwatering that looks! Isn’t it funny how one little process (like roasting) can make a food taste totally different?
Girl Heart Food says
I know what you mean!! Thanks very much, Pam 🙂
rebecca says
I’ve made my own almond butter before and it’s so delicious & easy. I’ll have to try your version, it looks tasty!
Girl Heart Food says
It sure is! Thank you Rebecca 🙂 Enjoy!
Kristen says
your pictures are making me drool! <3
Girl Heart Food says
Thanks Kristen!!
Mary // Chattavore says
I never love store-bought almond butter, so I am definitely going to have to give homemade a try!
Girl Heart Food says
You’re going to love homemade, Mary! Thanks very much 🙂
Stephanie@ApplesforCJ says
I eat almond butter on a daily basis so I really need to give this a try soon. I don’t know why I’ve never thought to make it myself but it does sound easy enough.
Girl Heart Food says
Once you make it yourself, there’s no going back 😉 Thanks Stephanie!
Lindsay Cotter says
Seriously cannot get any easier than this homemade roasted almond butter! With only 2 ingredients, it’s really so easy to make at home rather than buying store bought! Yes, I agree with you – the simple things are the best! And this recipe is simple and delicious! This is the kind of win- win that I love!
Girl Heart Food says
Totally!! Thanks so much Lindsay 🙂
Debra C. says
Oh my goodness, perfect easy and delicious! Roasting the almonds gives it an extra bit of flavor!! <3
Girl Heart Food says
The roasted almonds definitely add a nice touch 🙂 Thanks Debra!
Marissa says
Such a great idea to roast the almonds first, Dawn! I love almond butter and can’t wait to try making my own!
Girl Heart Food says
Thanks Marissa; it makes all the difference 🙂
Kim @ The Baking ChocolaTess says
I’m going to have to try this! It looks amazing!
Girl Heart Food says
Thanks so much Kim!